Beginners Guide to Rocket League Camera and Control Settings
If you are new to Rocket League, default bindings and camera settings often hold you back. The game does not explain why certain choices work at high level, so many players spend hours adjusting from a weak starting point. This guide gives you a better baseline: pro settings. Copy them first, then personalize only after you are used to them. The advice here is controller agnostic. Whether you use Xbox, PlayStation, Switch Pro, or any standard layout with two sticks, four face buttons, four shoulder buttons, and two triggers, the same ideas apply.
In this post you will learn why beginners should start from pro settings, get three pro configs you can copy (Zen, Daniel, and Dralii), and see exactly what to change first in your camera and controls. By the end you will have a clear path from default setup to a setup that supports growth instead of limiting it.
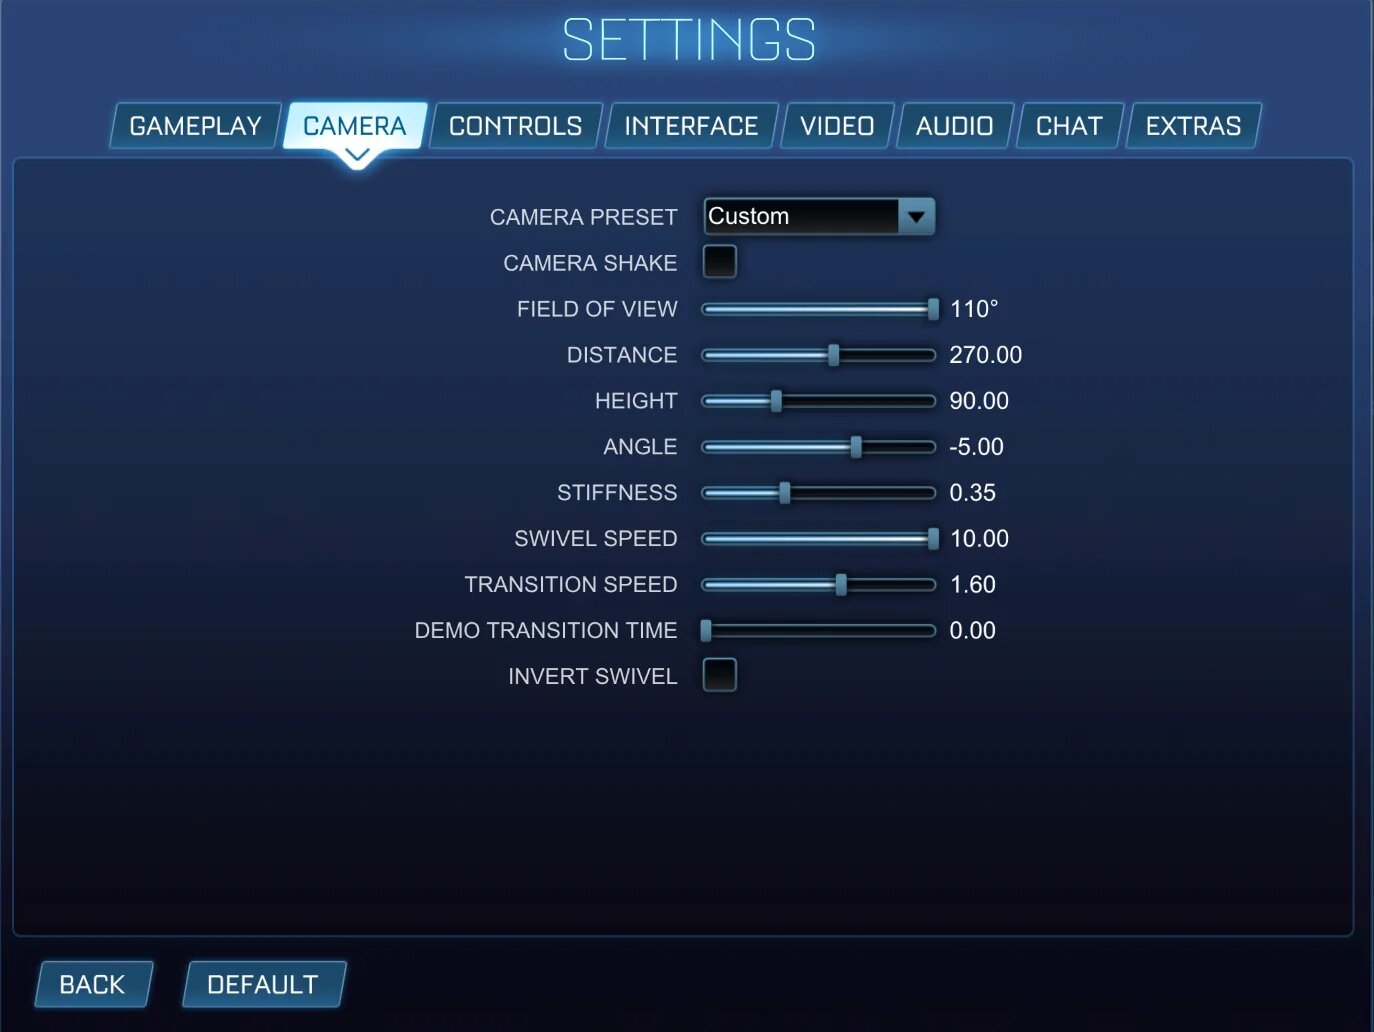
| Setting | Recommended |
|---|---|
| FOV | 110 |
| Distance | 270 (or 260 to 280) |
| Camera shake | Off |
| Boost | Upper shoulder button (bumper) |
| Directional air roll | Upper shoulder button (bumper) |
Pros use a narrow band of camera and control settings because that band works at the highest level. For beginners, that same band is the right starting point. You avoid the trap of tuning from a weak baseline and instead build habits on settings that already solve the problems that matter.
Those problems are consistent across controllers. The table below sums up why pro settings beat defaults.